Raspberry Pi 3 – Setup and First Boot (India)
Its always good to learn something new during a semester break and this time, since I had a relatively smaller one, I decided to go big, and try out something that had been on my wishlist for quite sometime – The Raspberry Pi 3.
Being a total beginner to this new interface, I did head into a few minor speed bumps, but in the end, I successfully got it to work. In this article, I will walk you through my journey into the world of Raspberry Pi 3, and how exactly I got it to work. Hopefully, my write up will be of use to those of you aspiring to try this amazing device for themselves.
What is a Raspberry Pi 3?
Basically, a Raspberry Pi 3 is a card sized computer that can be used for everything between electronics projects to more arduous tasks like media playback and even word processing. Think of it this way – A credit card sized mother board which, when plugged into a display, and coupled with a mouse and keyboard, acts like a computer. Raspberry Pi, has been around for a while now, and with every new iteration of their product, their board keeps getting better and better.
When I went to the electronics store to get myself a Raspberry Pi, I had to choose between the Raspberry Pi 2 and the newer Raspberry Pi 3, and while there supposedly isn’t a lot to differentiate between the two, I decided to go for the latest model, just so I could get full functionality , and when I would eventually document my experience, I would be writing about a more market relevant model.
Alright, so , the Raspberry Pi 3 ( Model B ) costs around INR 2500, and you should be able to get it in stores that deal in electronics kits for students. In Bangalore ( where I reside ), I was able to get it at OM Electronics on S.P. Road. At first, I thought that the Raspberry Pi, will have to be purchased with some additional accessories, but contrary to all my doubts, you can just buy the Raspberry Pi board, and get started.
You do get a slew of add-ons for the Raspberry Pi, but I would recommend that you first get fully acquainted with the basics of the Raspberry Pi and then go in for the add-ons.
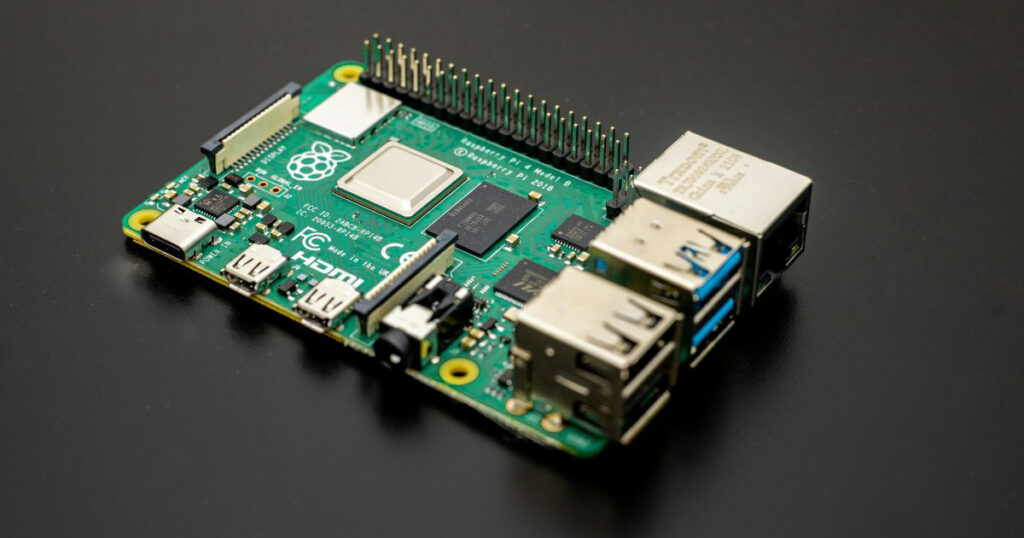
Coming to the Raspberry Pi 3 ( Model B ) – The board comes choc a bloc with features –
- The board features 1GB of on board RAM
- Bluetooth 4.1
- 802.11.b/g/n Wireless LAN
- 4 USB ports
- 1 MicroUSB port ( For the power supply )
- 1 HDMI port ( To connect to the display )
- A 40 pin GPIO port mainly for connecting add-ons
- A MicroSD slot as well for you to place the USB containing the OS
To get the board going, you will need the following additional components –
- A Laptop or a computer
- A display ( if you have a TV that has a HDMI port, that works too )
- An HDMI to HDMI cable ( This will allow you to connect the Raspberry Pi to the display
- A microUSB cable ( The same one you would use for charging most smartphones ) . Do keep in mind, that the MicroUSB port on the Raspberry Pi is purely for power supply, and nothing else.
- A MicroSD card – Make sure you use an SD card that has more than 4GB capacity, because the OS files usually stretch to around 3 GB space after installation, so any SD card between 8GB and above is OK.
- A USB mouse and Keyboard. You will have to connect the keyboard and the mouse directly to the Raspberry PI, using the On -board USB ports.
- Also get an SD card adapter, for formatting your SD card and placing the OS files onto it.
Setting up a Raspberry Pi 3
Once you have got all the items on the check list, we can now move to the next step.
Step 1. First up, head to the Raspberry Pi Website , and download the OS of your choice. The link I have provided will take you to the download page for the Raspberry Pi OS. It is one of the most widely used OS for the Raspberry Pi, and its easy to use . It is also the OS I have used for my sojourn.
Step 2. Once you download the ZIP file for the OS, place your SD card into the SD card adapter, and insert it into the Laptop using the card reader. Once detected on the PC, right click and format the SD card, and then place the OS zip file into the SD card, and then keep the SD card aside. In case your Laptop does not have a multi card reader, you can do this simple trick – insert the new SD card into your smartphone, and connect the smartphone to your laptop.
Once detected, just right click and format the SD card, and copy paste the OS Zip file onto the SD card, and then disconnect and remove it from the smartphone.
Step 3. Once the SD card has the OS Zip file , place the SD card into the SD card slot on board the Raspberry Pi. There is only one way of inserting the SD card, so it shouldn’t take time.
Step 4. Now, connect the Mouse and Keyboard to the USB ports on board the Raspberry Pi. Now, take the HDMI to HDMI port, and connect one end to the Raspberry Pi, and the other end to the display you are going to use. In my case, I used my TV as I didn’t have an independent display on hand, but really, you can use any display with an HDMI port.
Step 5. Once you have made these connections, take the microUSB cable and connect the Raspberry PI to your PC or laptop, as the latter will act as the supply. Mind you, the Raspberry PI doesn’t not need a dedicated supply, connecting it to your laptop will do just fine.
Step 6. Once the Raspberry Pi is powered on and the display is connected, you will be greeted by a NOOBS interface which will show you the SD card you have inserted and the corresponding OS ZIP file, that you have placed. Use your Mouse to navigate to the Zip file, click on it and then select the install option that you will find on the top bar. The installation is automatic, and in a few minutes Raspberry Pi OS will boot up.
This concludes the setup and installation.
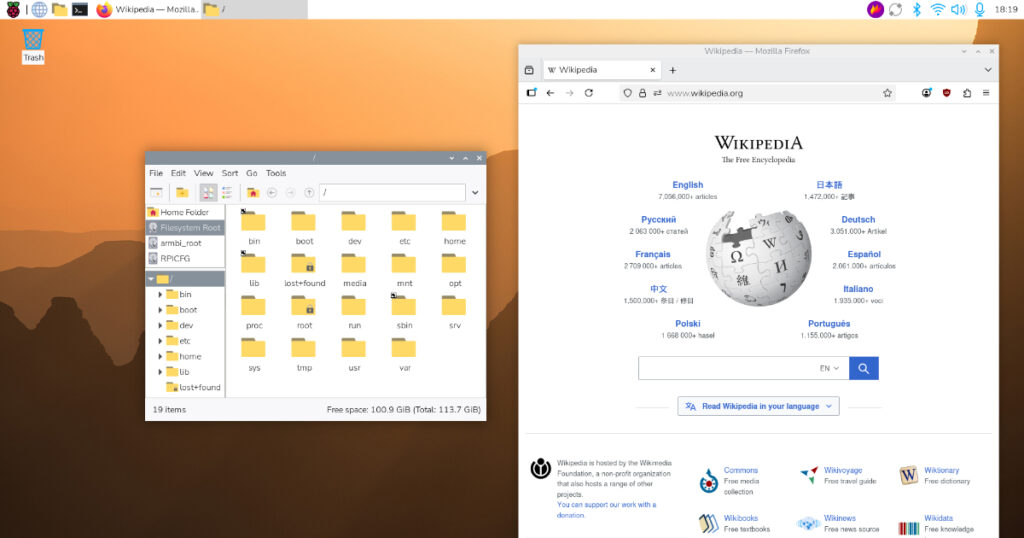
The Raspberry Pi OS is more GUI and therefore, very simple to use. It has got a truck load of features that will cater to programmers and general public alike. I saw a BlueJ Java editor, a few editors for python, while there is also this nice little application that teaches the essentials of programming to younger audience.
We also get the Libre Office Suite, which is the open source version of the MS Office Suite. We also get a web browser to do some browsing. The exact run through of the entire feature set, I shall cover in my next article, and subsequently, I’ll also walk you through projects that you can do using the Amazing Raspberry Pi.
I hope you found this article useful. The Raspberry Pi community is growing, and I am proud to be a member of it .